How to make your own Brush Lettered jewellery dish

How to make your own Brush Lettered jewellery dish
You’ve probably noticed that over the last couple of months I’ve been pretty busy teaching 25 Brush Lettering workshops with Hobbycraft. It’s been so lovely to share my love of Brush Lettering with so many people and also watching everyone else fall in love with Lettering as they learn. I’ve had lots of messages asking about how I combine Brush Lettering into my craft projects so I thought I’d share this simple Brush Lettered Jewellery dish DIY taken from my first book Modern Brush Lettering. Its the perfect craft for combining your new found love of lettering with clay crafts…
Materials
Paint brush
Oven tray
How to make Brush Lettered Jewellery Dishes
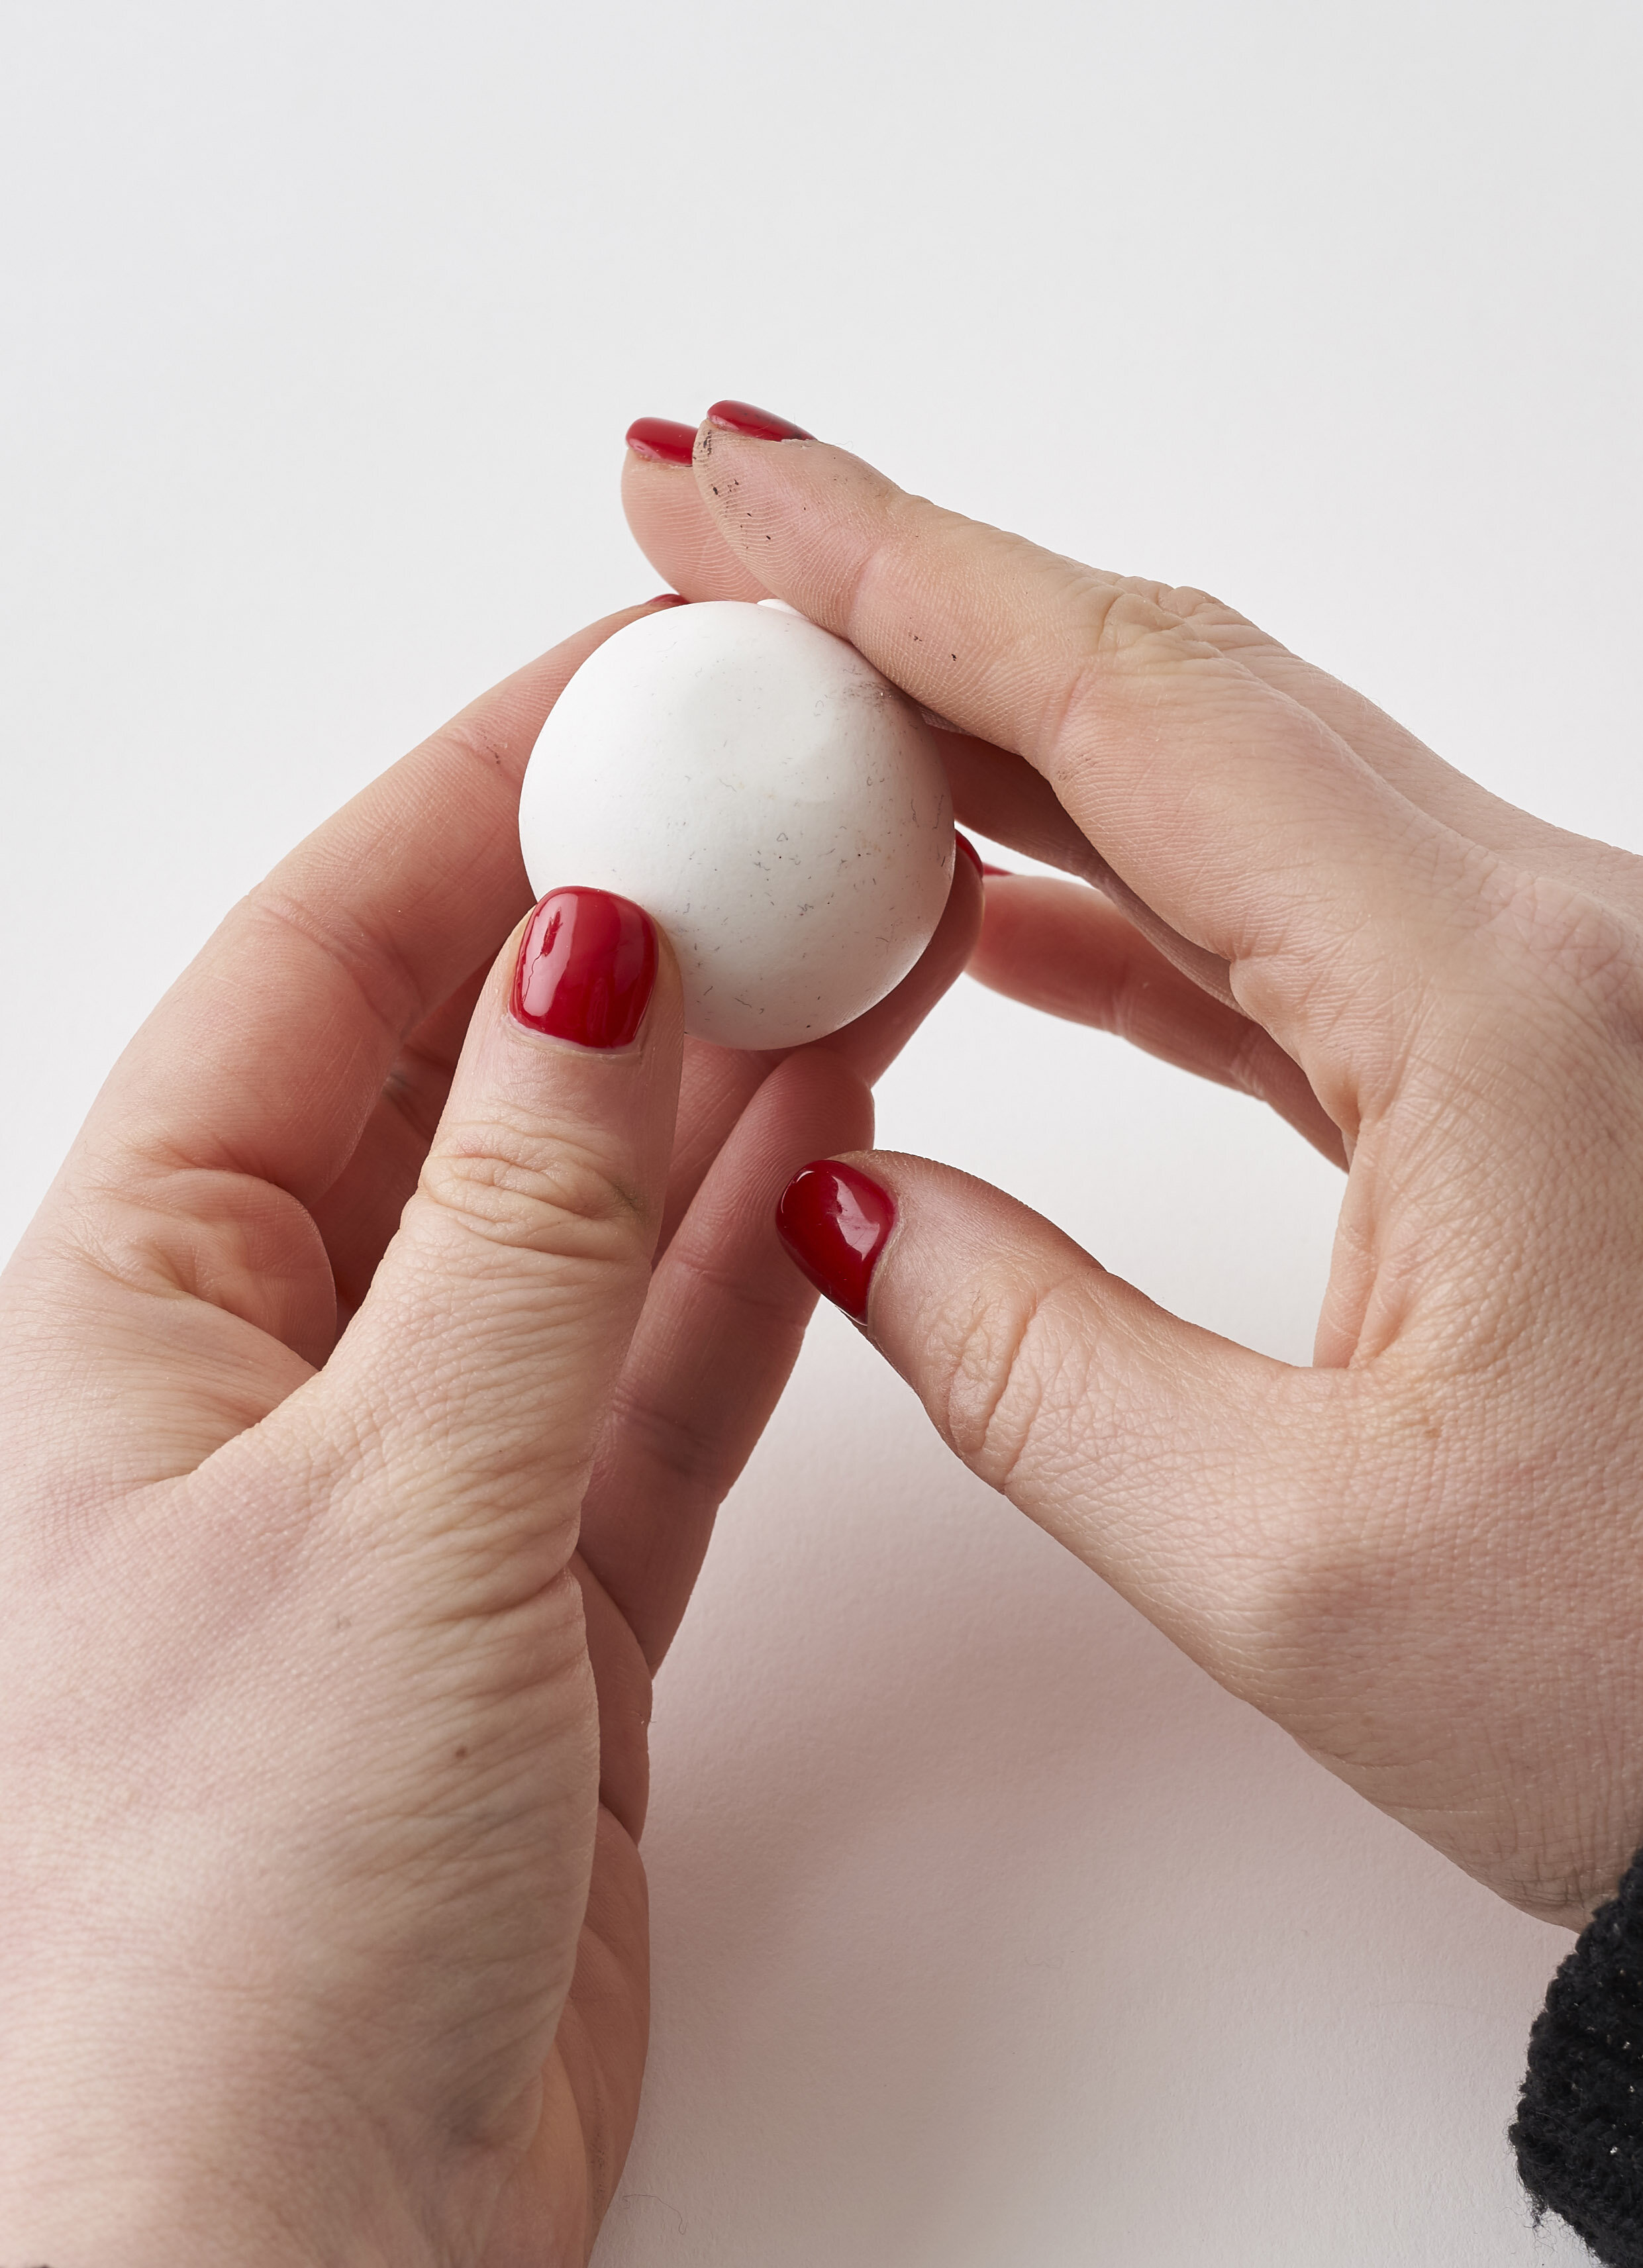
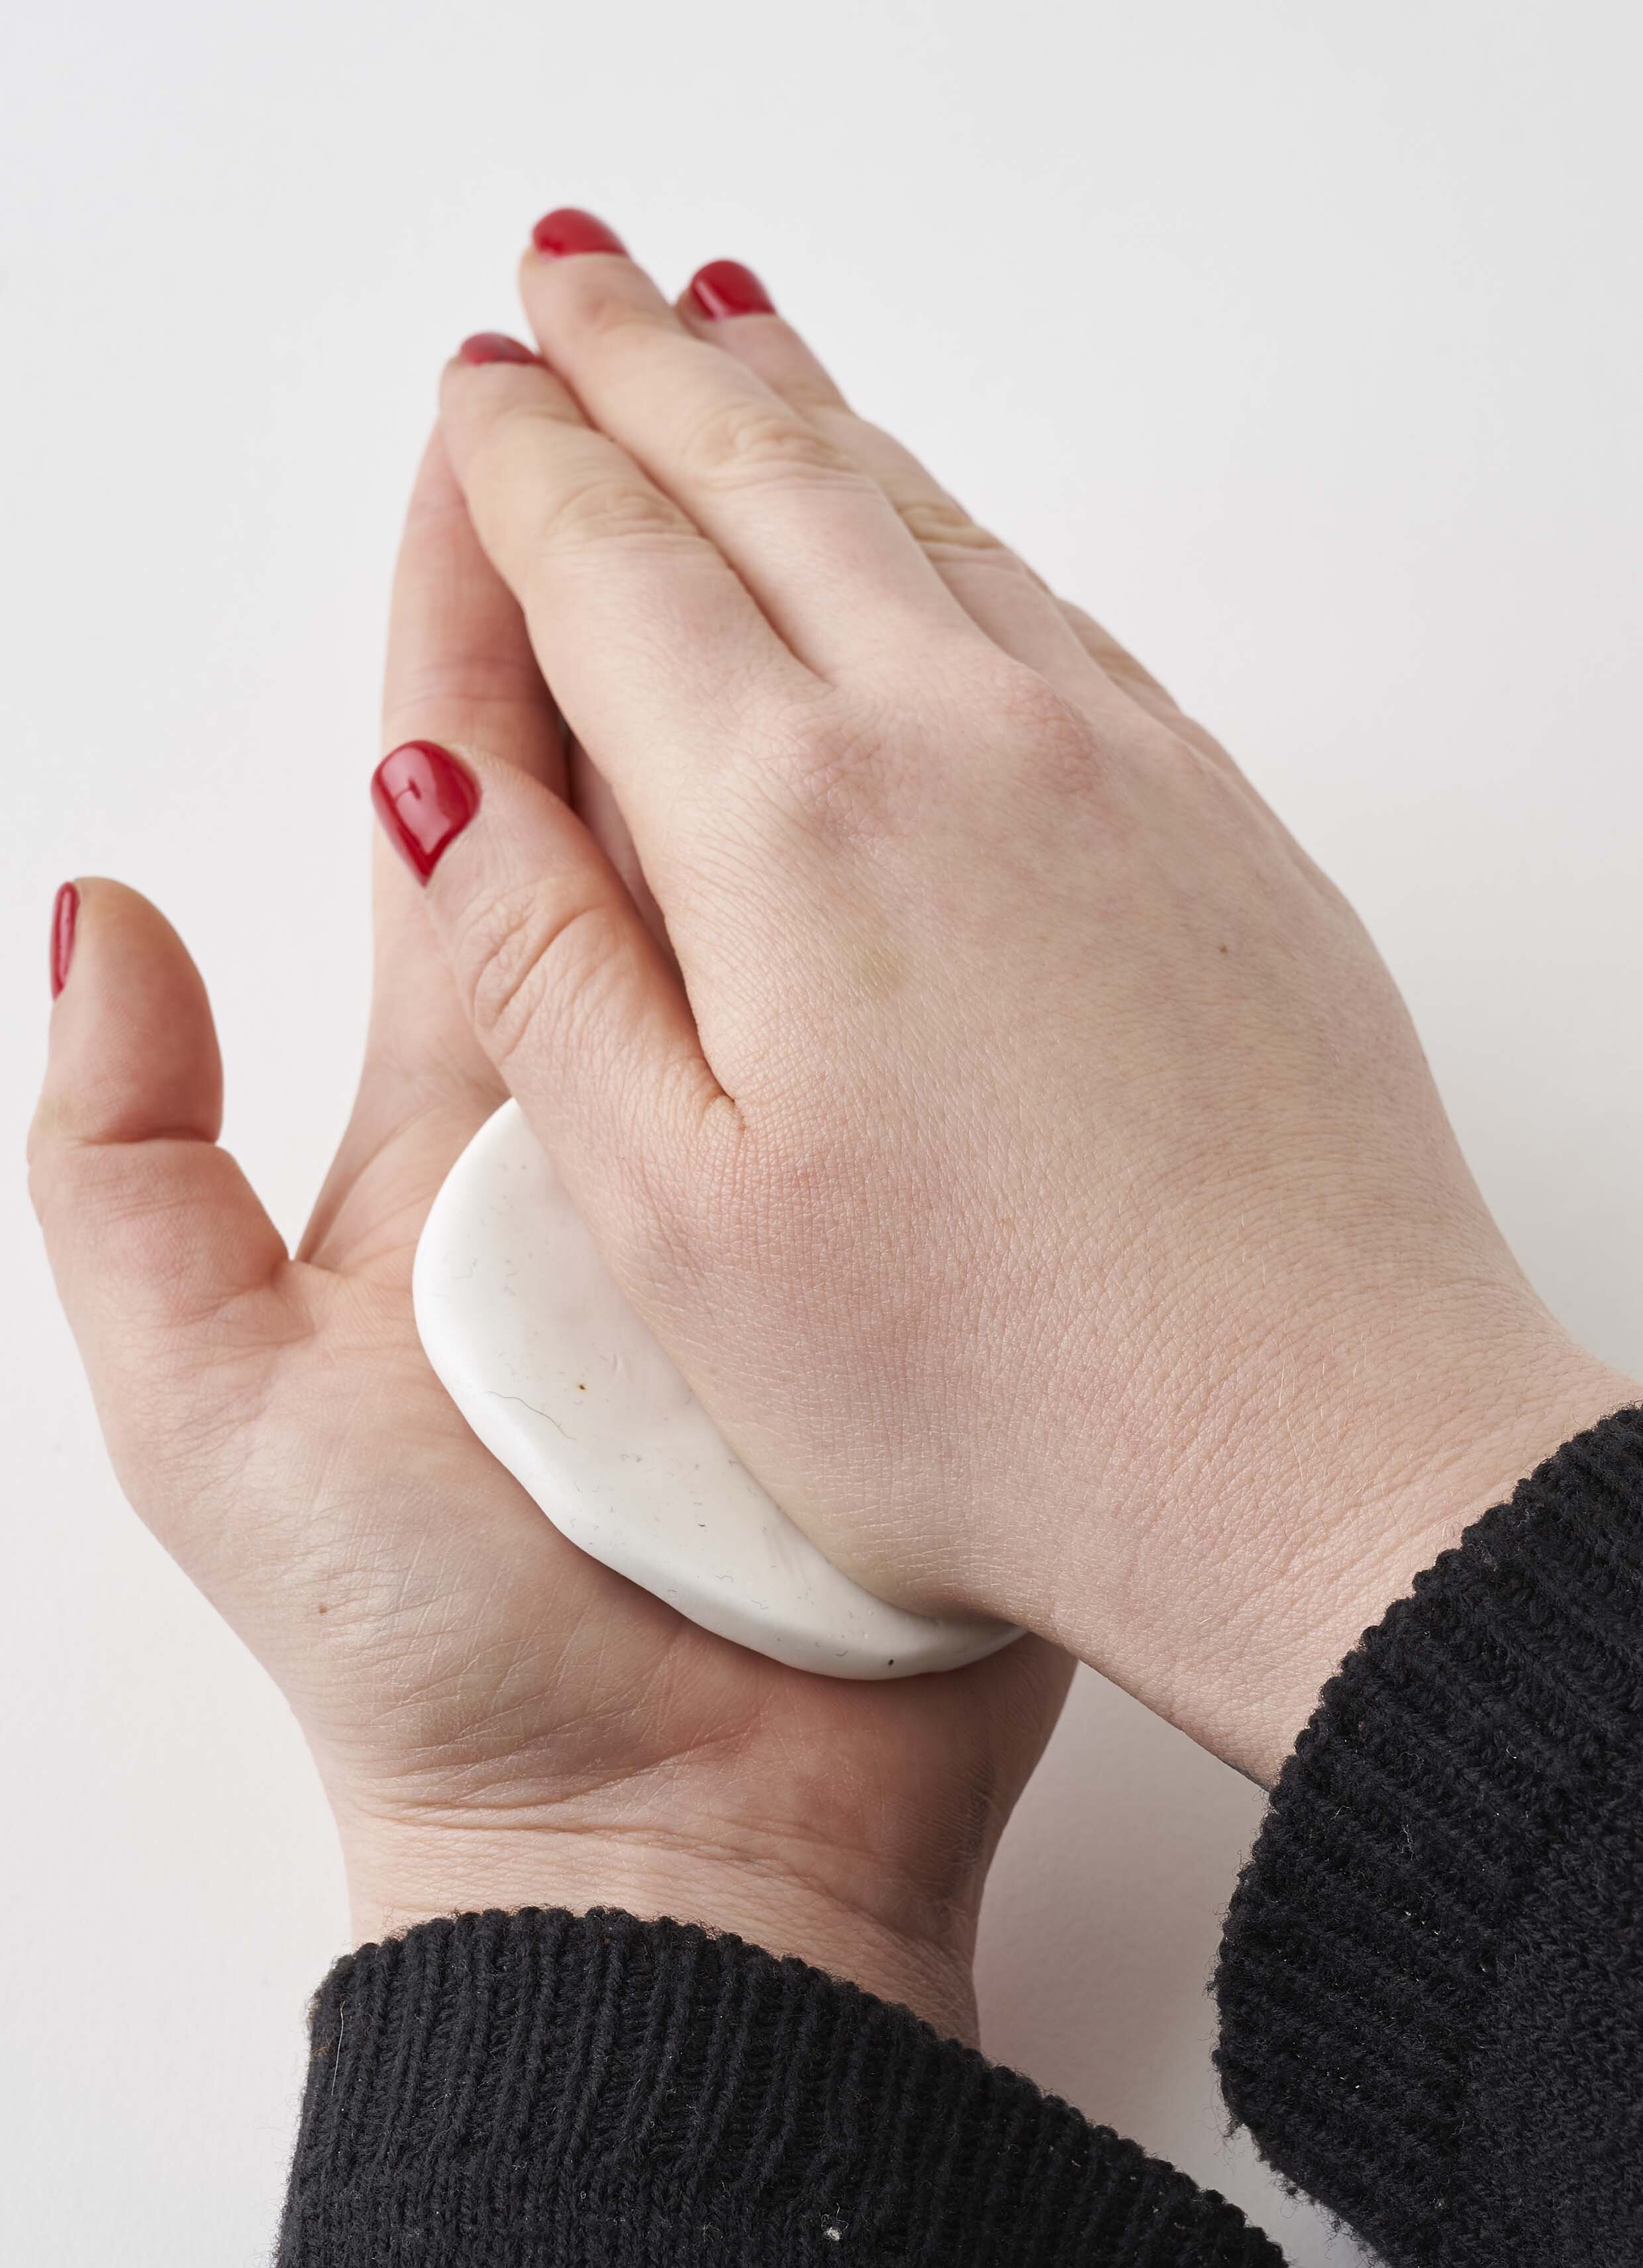
Begin with your fimo clay, I have chosen white as my base as it has a fresh look and feel and the gold brush lettering pen will work well on the colour. You will need to warm up the clay in your hands and form a round the size of a golf ball. The clay picks up anything it touches so be sure to work on a clean surface and wash your hands before starting. Flatten the ball in the palm of your hands, you will need to press firmly to flatten the clay. Try your best to keep the thickness of the clay as equal as you can as you press down.
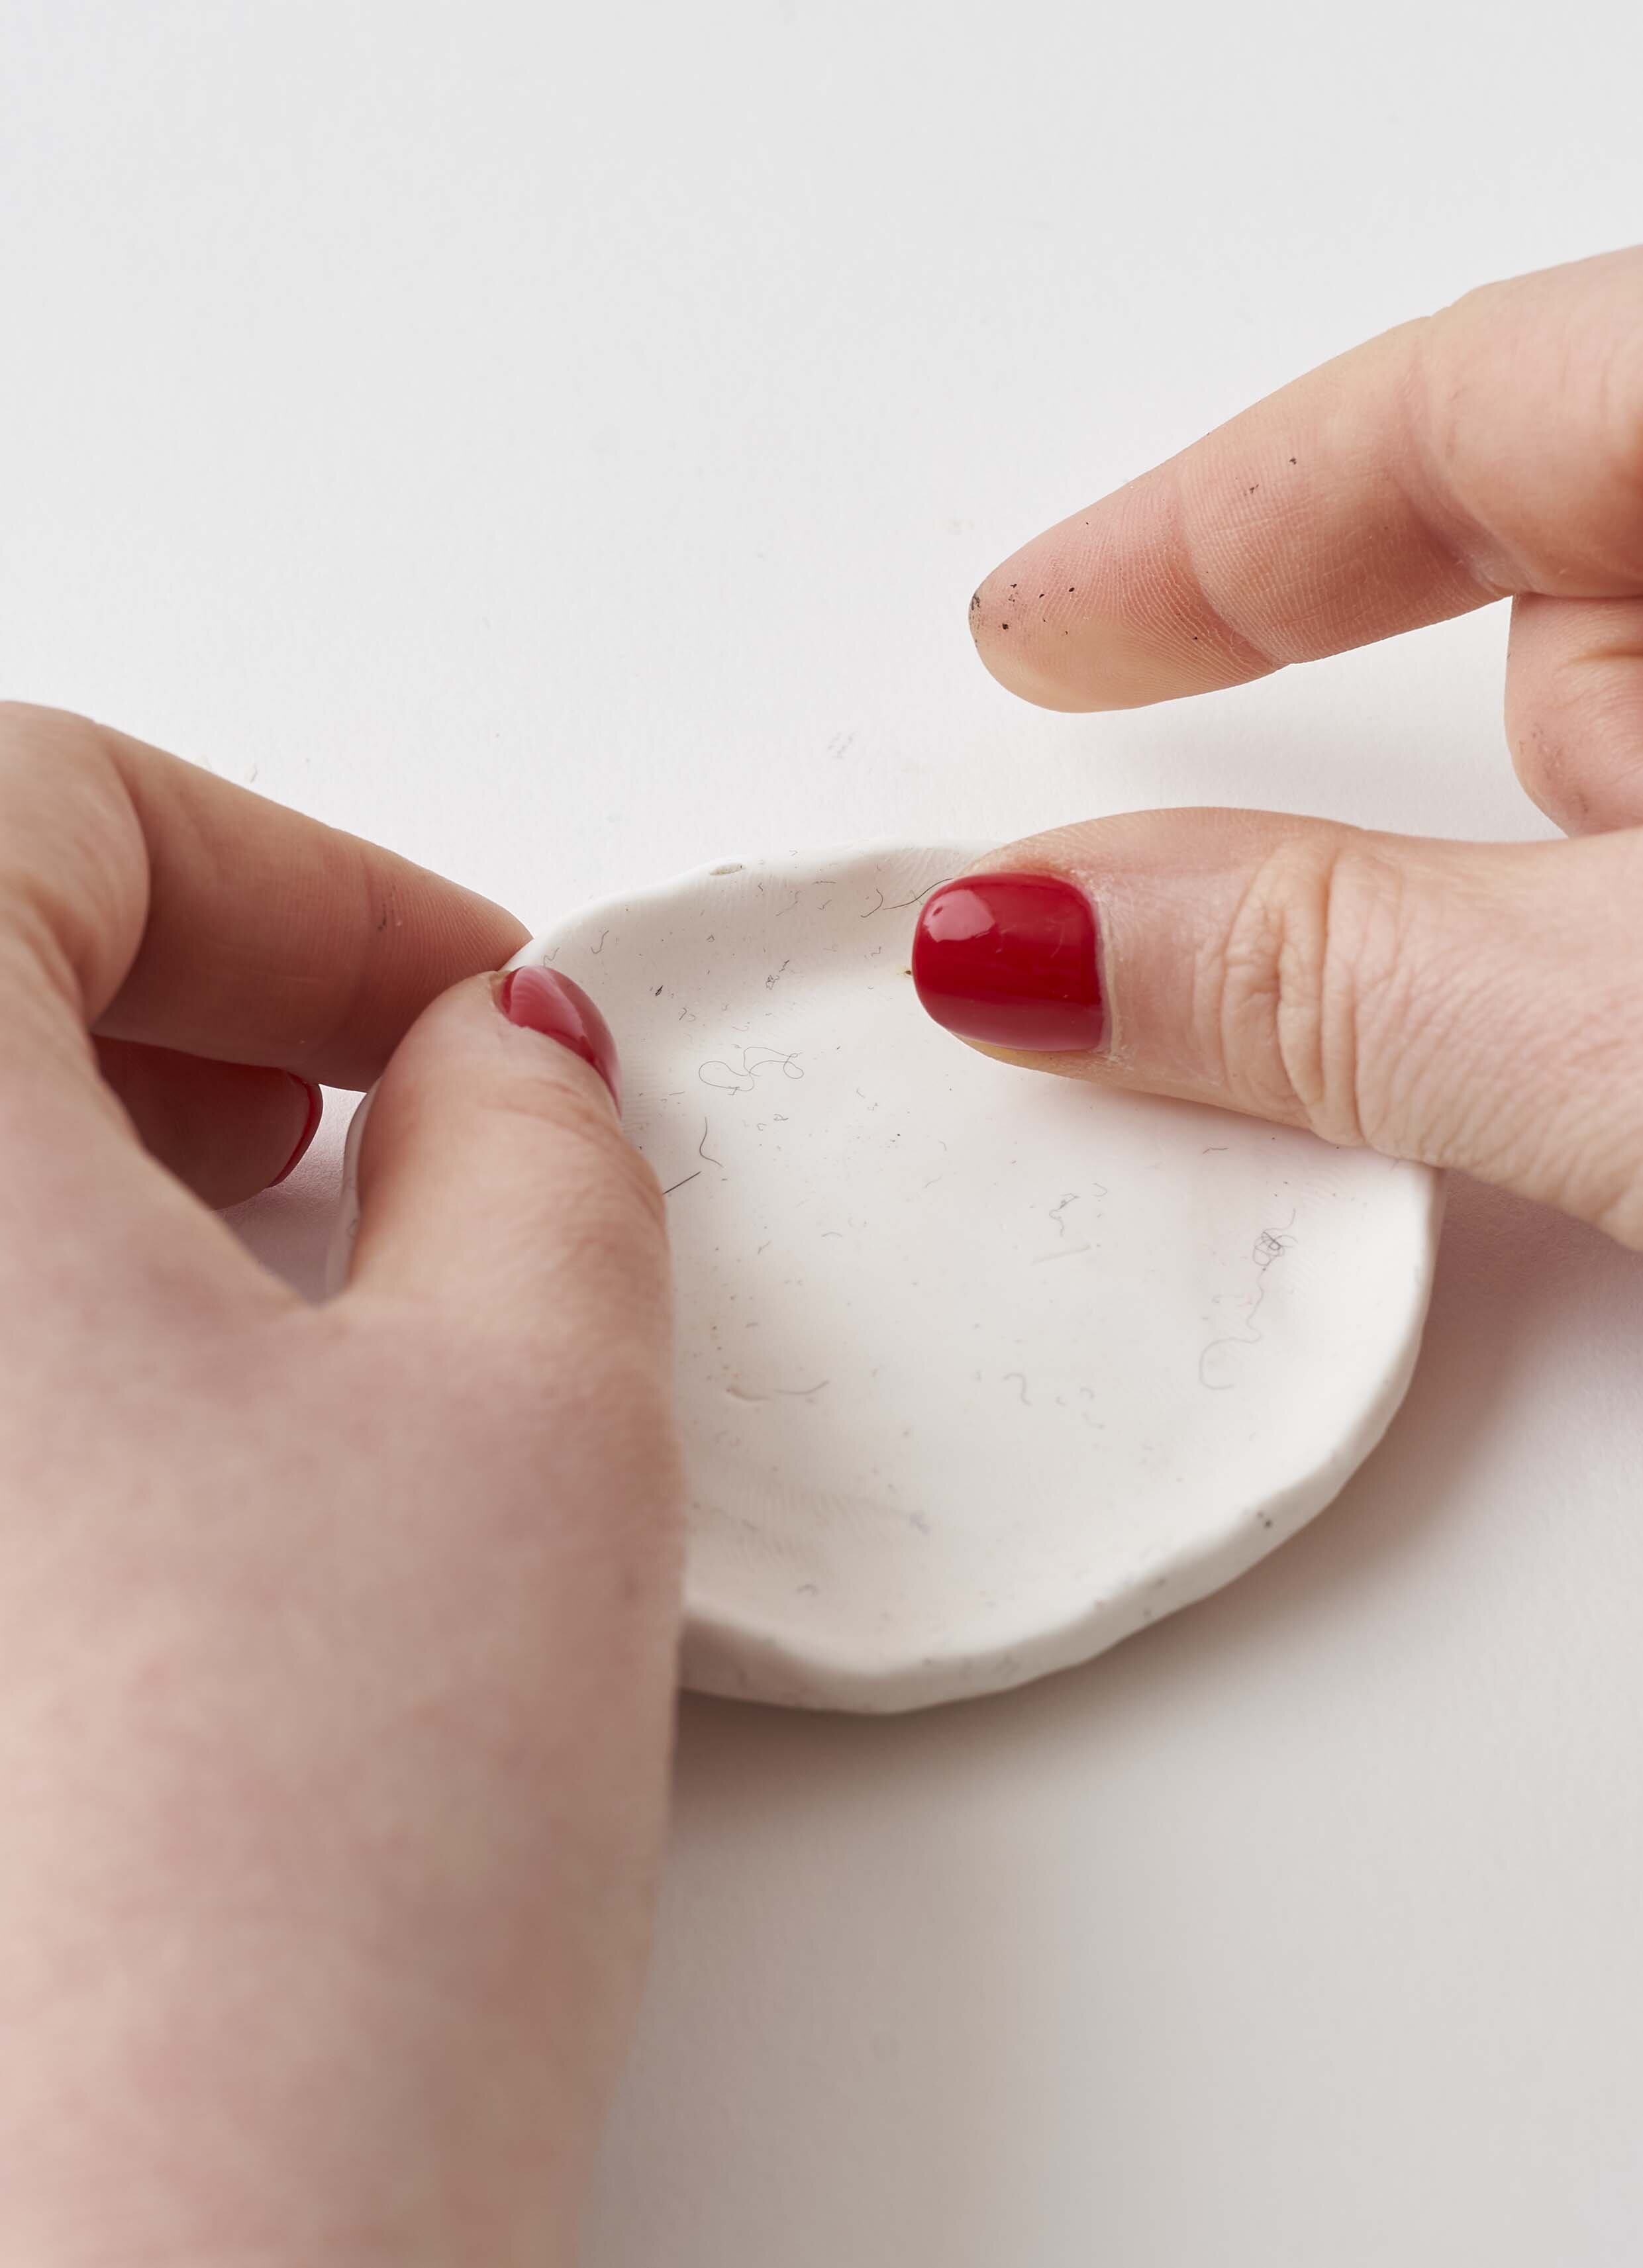
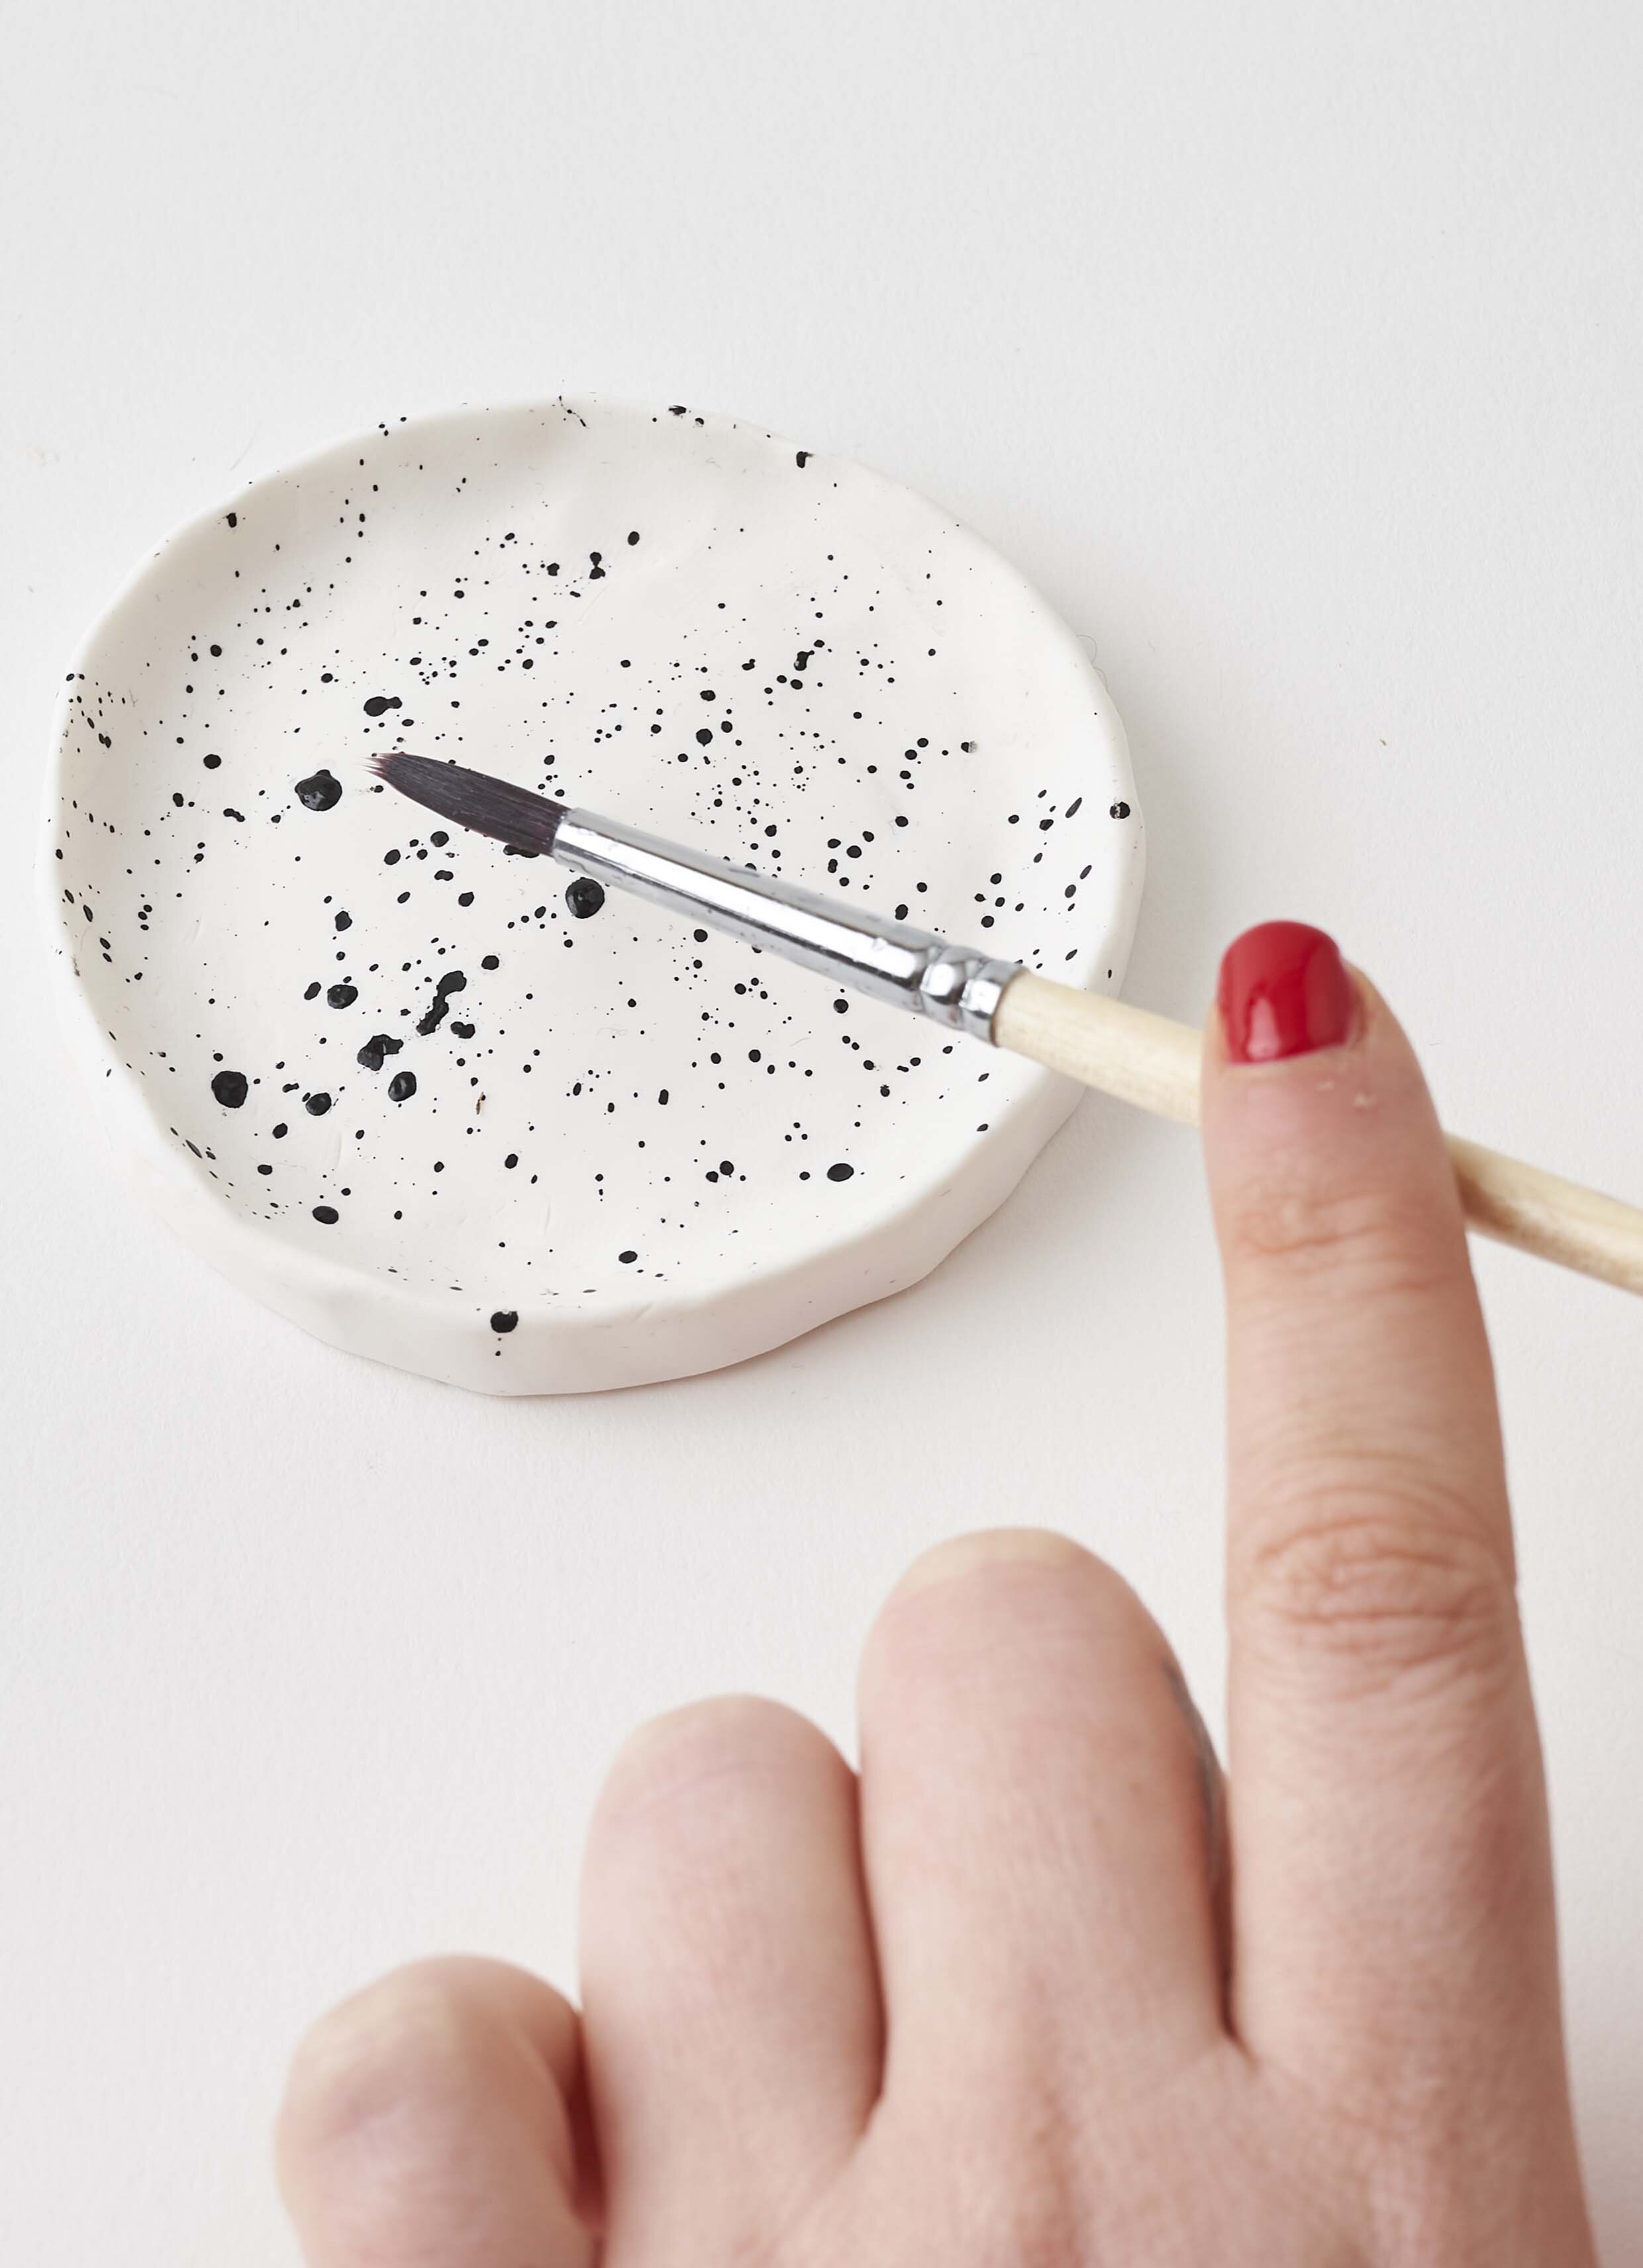
Once flattened you can place on a flat surface, be careful not to press down too hard as the clay will stick. Using your finger and thumb begin to pull the rim of the dish upwards, pinching it and pulling it gently so that you create an equal rim around the dish. When you are happy with the shape, dip your paint brush into some ink and tap it over the dish. This will create the splattered effect and the great thing about the dishes is no two will be the same!
Place your decorated dishes on an overproof dish, give them enough space so they aren’t touching else they will merge together when baking. Pop in the oven on 100 Degrees for 20-30 minutes, its important for them not to be baked at a higher temperature else you will burn the clay. Check your dishes after 20 minutes, if they feel firm then take them out to cool however if they still feel flexible (this will all depend on the thickness you have created) then keep them in for up to 30 minutes.
Once cooled it’s time for Brush Lettering and gold detailing. Draw around the rim with the gold pen to create a gold edging on the dish before you start your Brush Lettering. Capital letters work brilliantly for this project & if you’re worried about working straight onto the clay use a pencil to rough out where your letter will sit.

Once you’re happy with your Letters then leave to dry, you can use a varnish to waterproof them however because I’ll be using mine for Jewellery I’m not applying a varnish.
These Brush Lettered dishes would make lovely gifts for christmas or they are the perfect craft to just explore combining your Brush Lettering with clay.

This project was taken from first book, Modern Brush Lettering which you can order here